I once had a coworker send me a dummy website as part of testing requirements for a code review. The website just had one button, and the button triggered some JavaScript. It was meant to be used in tandem with an iframe to test a larger, more sophisticated feature that she was working on. The site was sent to me in a zip file with simple instructions: unzip, cd test_site, npm install and npm start.
There was one part of that whole process that I could honestly never get out of my head.
I just downloaded 200+ megabytes of Node Modules for a single
<button>tag.
Now, in hindsight, she could have easily sent me an index.html file with all of the same requirements, but heres the thing.
I don’t blame her.
She is a solid React developer who has implemented and shipped tons of production quality React code. She was comfortable with the tools, and the thought of busting out create-react-app, whipping up a simple React app and sending it over to the code reviewers seemed like a no-brainer… and honestly, it SHOULD be that way.
What Exactly Is “Modern” React Development?
When I say “Modern” React development, I’m referring to the set of additional tools that drastically improve the React development experience, such as:
- modern ecmascript support (modules, async/await, destructuring, etc.)
- live reloading
- css injection
- browser synced page events
- code transpilation
- build generation
- code linting
- task running
- hot module reloading
- …and the list goes on
Quite a few of these features aren’t specific to React and have existed within other tech stacks for a long time, but setting them up with React (or just Node.js in general) can be quite cumbersome.
Let’s look at ways we can make it easy.
Setting Up A Slim React Dev Environment
This tutorial will demonstrate how we can access almost all of those “modern” advantages in our React development workflow but with only ~18MB of node modules.
Snowpack - The Faster Front-End Build Tool
Wait, another build library? Snowpack was designed to address front-end development’s biggest headaches. It takes very little configuration (if any at all) to get a ton of functionality out of it. It utilizes ECMAScript modules (ie. import / export), is powered by Web Assembly (super fast) and has out-of-the-box support for TypeScript, JSX, CSS Modules, Hot Module Reloading and more.
We will be using the following versions of Node.js and NPM respectively:
$ node --version && npm --version
v15.6.0
7.4.0
Let’s create a new project and set it up:
mkdir snowpack-skypack-react
cd snowpack-skypack-react
npm init -y
npm install --save-dev snowpack
Create a src folder, this is where our source code eventually go:
mkdir src
Let’s create a placeholder index.html file for now to test out Snowpack’s dev server:
touch src/index.html
Fill it with the following:
<!DOCTYPE html>
<html>
<head>
  <title>Snowpack Skypack React</title>
</head>
<body>
  Hello World.
</body>
</html>
Now let’s create a Snowpack config file (I promise, these will be the ONLY configuration steps in this tutorial):
npx snowpack init
This will create a snowpack.config.js file, open it and add src: '/' in the mount section like so:
module.exports = {
  mount: {
    src: '/'
  }
}
What this will do is allow our src directory to be the root for our dev server instance or production build.
Run the dev server with npx snowpack dev and you should see the following in your browser:

CDN-Based React Development With Skypack
With newer technologies emerging like deno, its obvious that CDN-based development is making a hot comeback, and I’m all for it.
There are a few options out there for optimized node packages, such as UNPKG and jsDelivr but for this tutorial, we will use Skypack. We will use it to import node packages for React and ReactDOM from their CDN directly into our code.
First we are going to create a main.jsx file in our src folder:
touch src/main.jsx
And fill it with the following:
import React from 'https://cdn.skypack.dev/react';
import ReactDOM from 'https://cdn.skypack.dev/react-dom';

const App = () => {
  return (
    <h1>Hello World x2</h1>
  );
}

ReactDOM.render(<App />, document.getElementById("root"));
Note that this is a .jsx file, not a .js file. Now we can update our src/index.html file with <div id="root"></div> and <script> tag like so:
<!DOCTYPE html>
<html>
<head>
  <title>Snowpack Skypack React</title>
</head>
<body>
  <div id="root"></div>
  <script type="module" src="main.js"></script>
</body>
</html>
And we should see this:

Whats important to notice here is that for the script src we use the extension .js in src="main.js" even though we named our file main.jsx. When Snowpack serves our jsx file it automatically transpiles and serves it as .js.
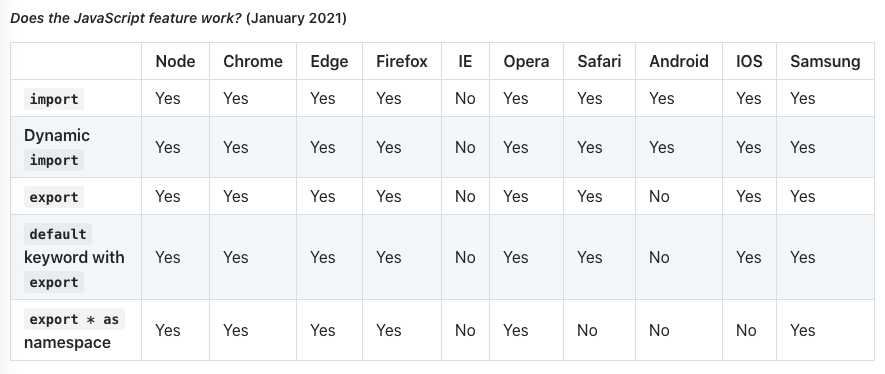
Another important thing to note is we are using type="module" which is now supported in most modern browsers. I’ve created a simplified chart based on the one from MDN’s JavaScript Modules page:

So using type="module" in your script tag should be good for the most part.
And That’s It!
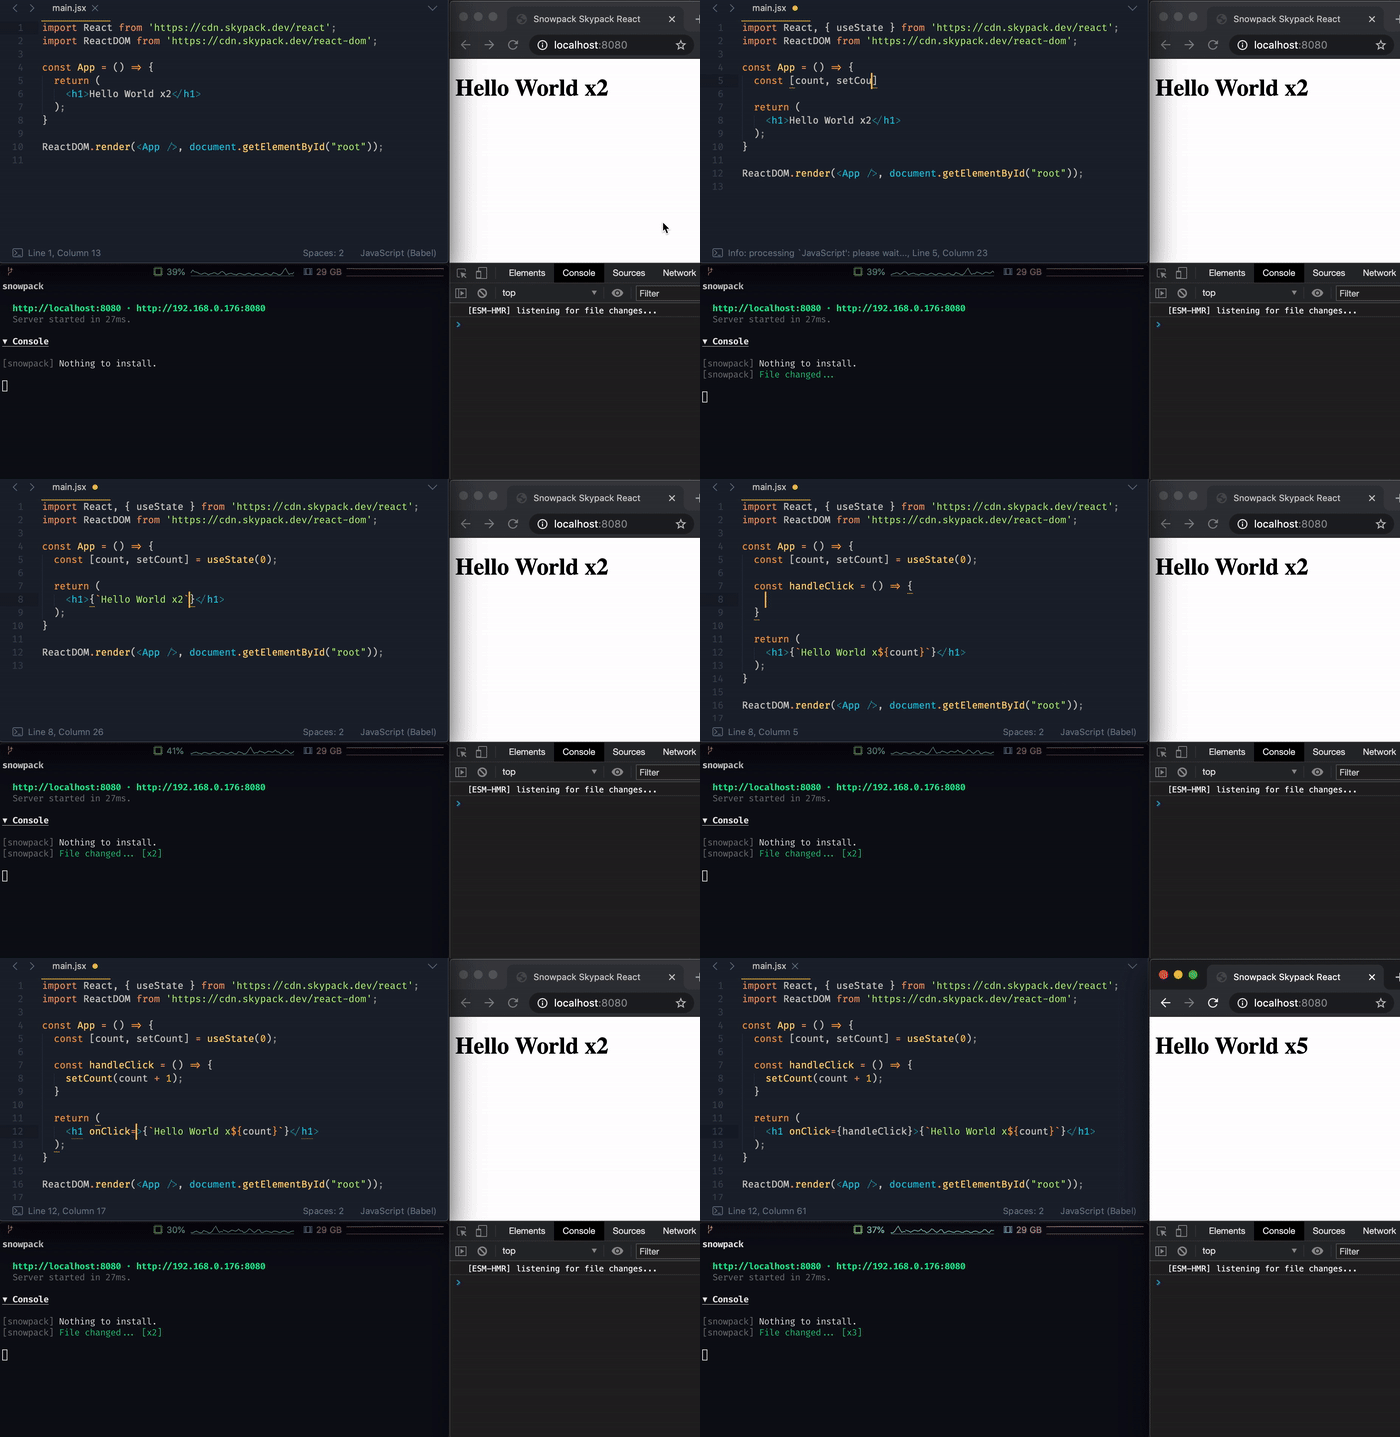
We can now build our React App in comfort:

Once you are ready, you can generate a build using the following:
npx snowpack build
And it should give you a build in the structure of:
build
├── _snowpack
│   └── env.js
├── index.html
└── main.js
A Quick node_modules Folder Size Comparison
As of January 2021, with Node v15.6.0 and NPM v7.4.0:
npm install create-react-appdownloads266.7MBofnode_modulesnpm install react react-domdownloads3.7MBofnode_modulesnpm install snowpackdownloads17.7MBofnode_modules
The main point of this comparison is that create-react-app comes with a full suite of additional libraries that help provide that “modern” development experience but size-wise is comparable to installing a whole IDE. To put it in perspective, my local install of Sublime Text 3 along with the bajillion plugins i’ve downloaded for it comes out to ~245MB.
Just some food for thought. Happy Coding!